If you're a UK business owner watching your energy bills climb higher every quarter, you're not alone. The good news? Commercial solar installation is one of the smartest investments you can make in 2026: and it's far less complicated than most people think.
We've helped dozens of businesses across the UK slash their energy costs by up to 70%, and the process is surprisingly straightforward when you know what to expect. Whether you run a warehouse in Derby, a manufacturing facility in Nottingham, or a retail space anywhere in between, this guide will walk you through exactly what happens from your first phone call to the day your system goes live.
Let's break it down into five manageable steps.
Step 1: Initial Consultation and Site Assessment (Week 1)
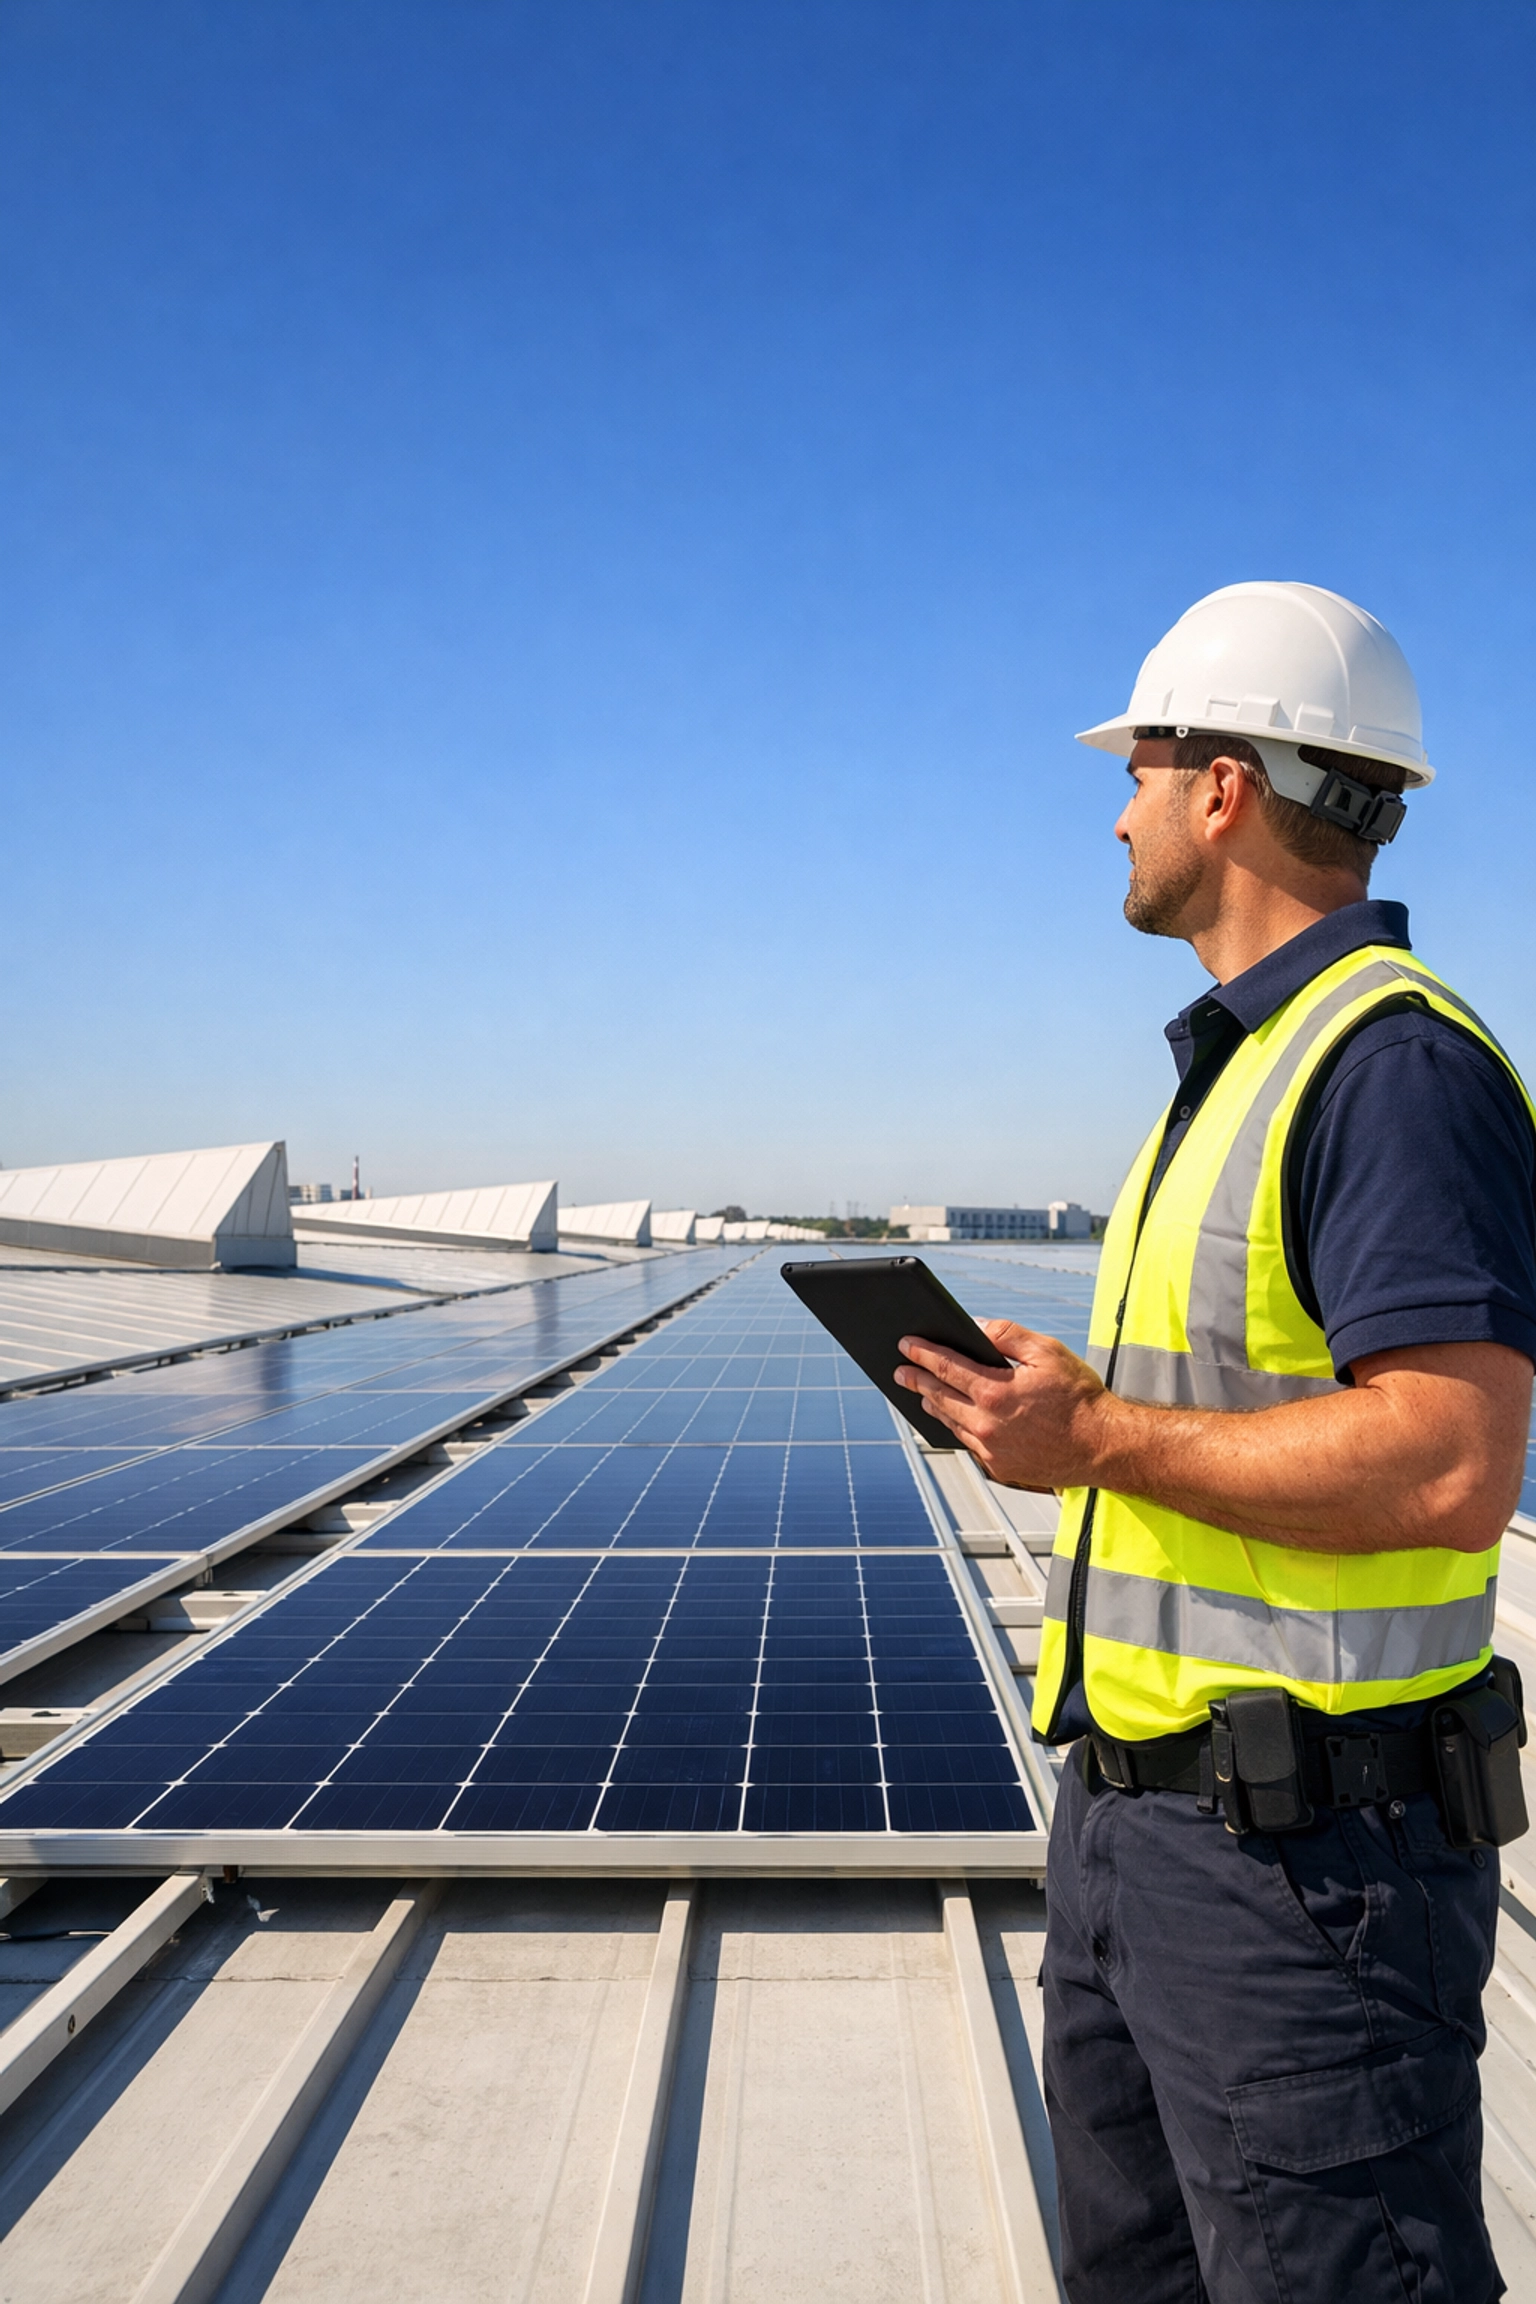
The journey begins with a thorough site assessment: think of it as a health check for your building's solar potential.
A qualified solar installer (ideally MCS accredited like Live Solar) will visit your premises to evaluate several critical factors:
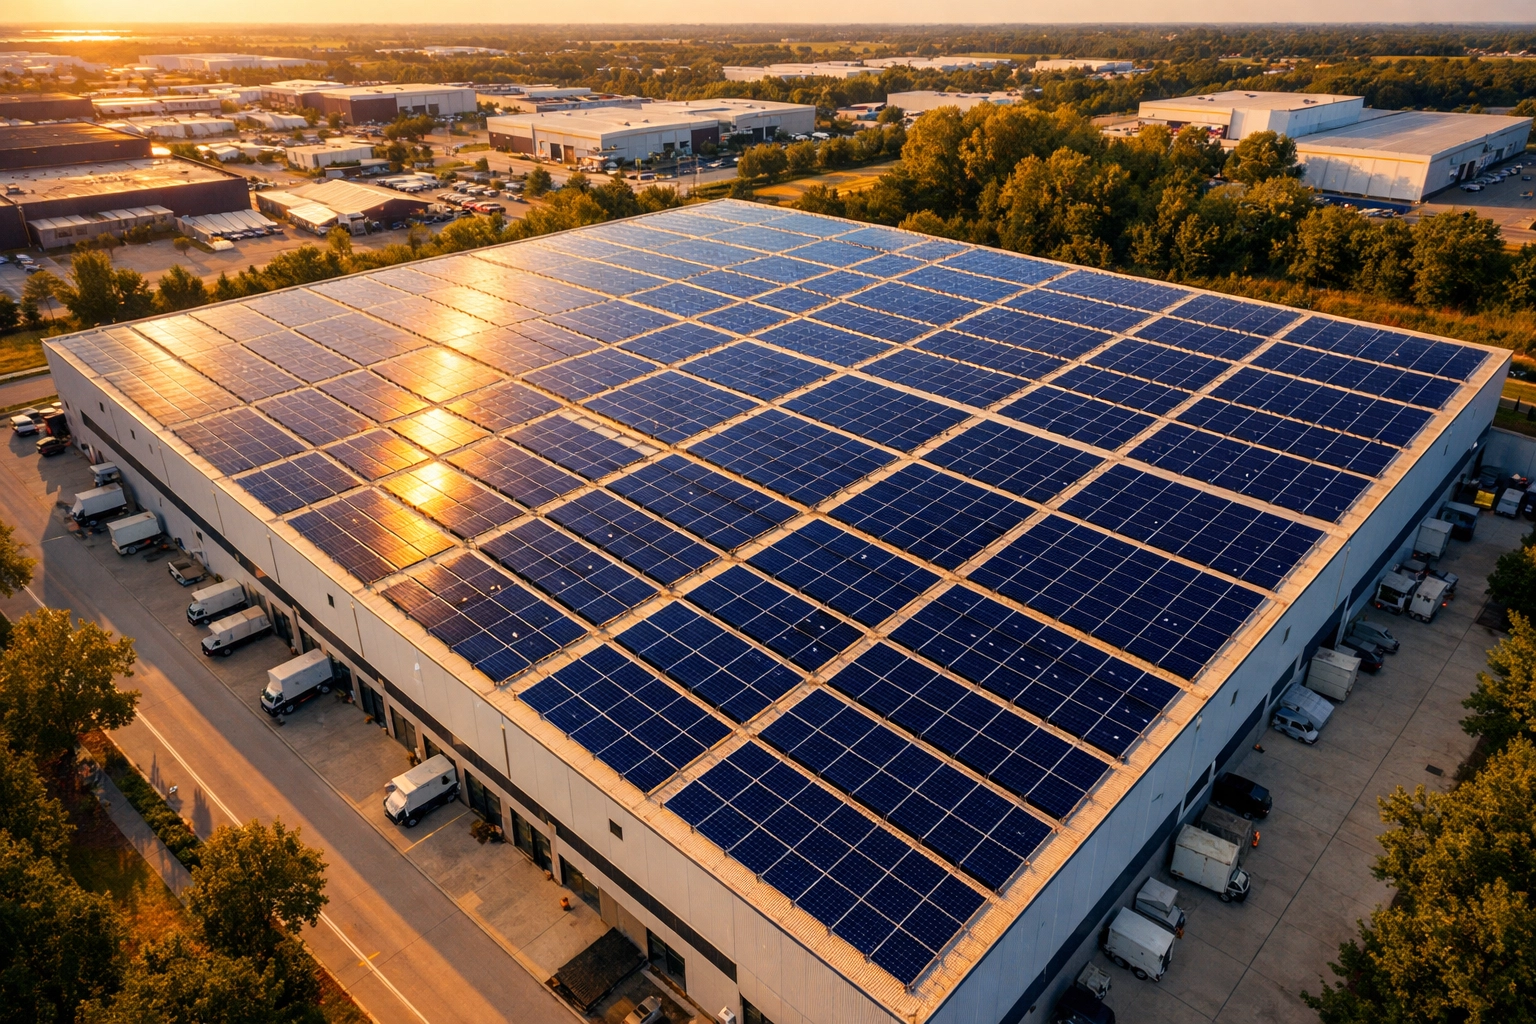
Roof suitability is the big one. Your installer will check the orientation (south-facing is ideal, but east and west work too), examine shading from nearby buildings or trees, assess the structural integrity of your roof, and measure available roof space. Not every roof is perfect, but most commercial buildings have plenty of viable space.
Your existing electrical infrastructure also gets a once-over. Can your current setup safely handle a solar PV system? What's the condition of your switchgear and distribution boards? These details matter for a smooth installation.
After the assessment, you'll receive a detailed proposal document outlining the recommended system size, estimated costs, projected savings, payback period, and return on investment. This is where you'll see those potential 70% savings in black and white.
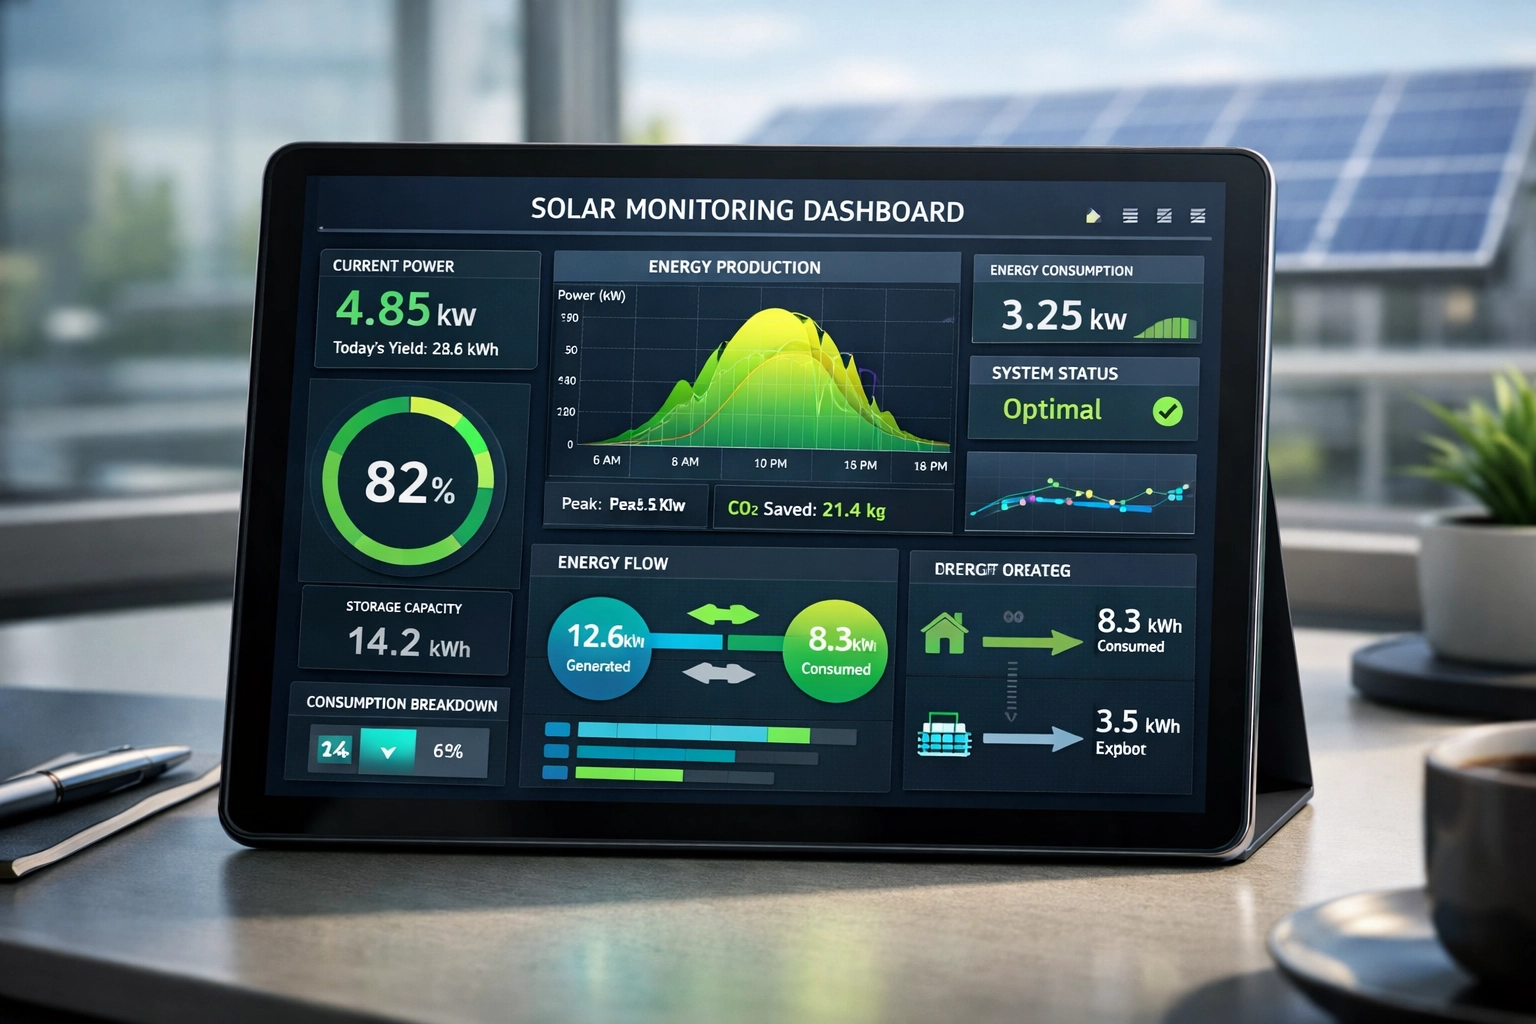
At Live Solar, we pride ourselves on transparent assessments backed by our cutting-edge real-time monitoring technology. We show you exactly what you can expect: no inflated promises, just solid numbers based on your actual energy usage patterns.
Step 2: Choose Your Installer and Lock in the Details (Week 2-3)
Here's where things get real. Once you've reviewed proposals (and yes, you should get quotes from multiple installers), it's time to appoint your chosen contractor.
What to look for in a commercial solar installer:
- MCS accreditation (this is non-negotiable for quality and warranty protection)
- Proven track record with commercial installations
- Transparent pricing with no hidden fees
- Strong aftercare and monitoring support
- Genuine expertise in UK grid regulations
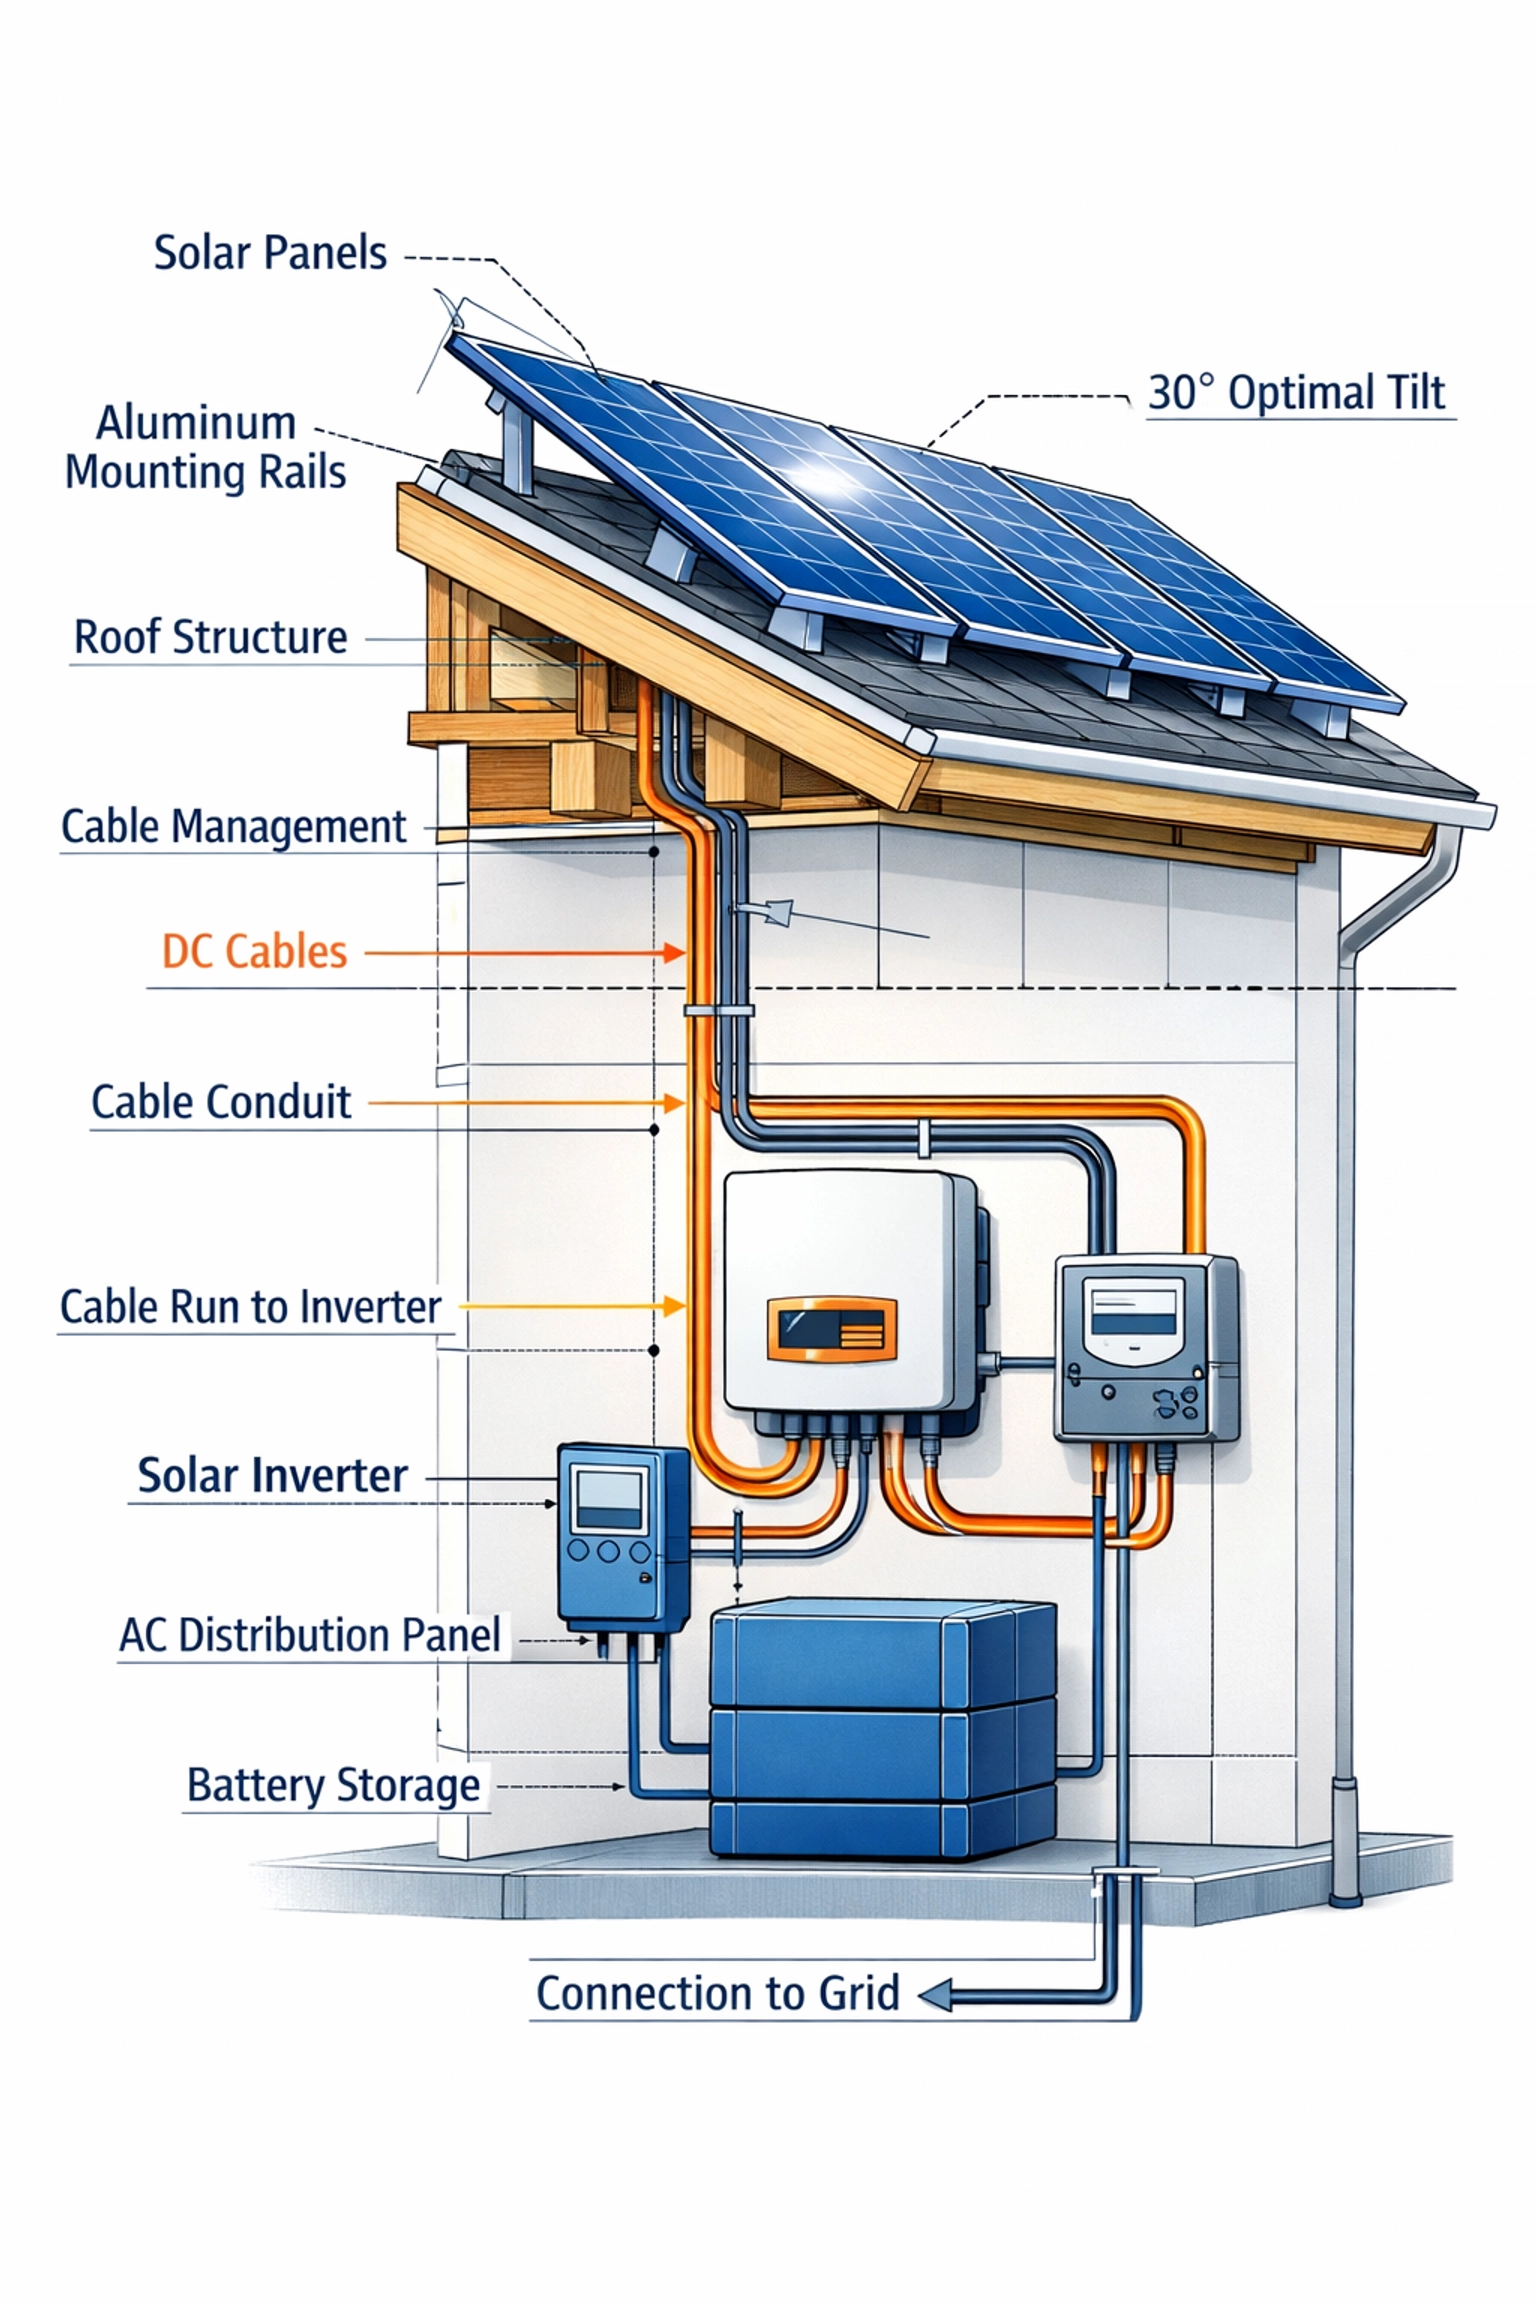
Once you've signed on the dotted line, your installer conducts a detailed electrical survey. This involves checking your building's incoming electricity supply, examining all switchgear and distribution boards, mapping viable cable routes from roof to inverter, and identifying any electrical upgrades needed.
Think of this stage as the detailed planning before the build. The more thorough your installer is now, the smoother your installation will be later.
Pro tip: Ask about real-time monitoring capabilities from day one. At Live Solar, every system we install includes advanced monitoring so you can track your generation, consumption, and savings in real-time. It's not just nice to have: it's essential for maximizing your return on investment.
Step 3: Navigate Planning Permission and Grid Approval (Week 3-5)
This is where many business owners expect headaches, but honestly, it's usually pretty straightforward.
Planning permission: Most rooftop commercial solar installations fall under Permitted Development Rights, meaning you don't need planning permission. That said, you will need permission if your building is listed or in a conservation area, panels project significantly from the roofline, or you're considering a ground-mounted system.
Your installer typically handles this paperwork, but it's worth understanding the requirements for your specific situation.
DNO approval (the G99 application): If your system exceeds 3.68 kW for single-phase supply or 11 kW for three-phase supply (which most commercial systems do), you'll need Grid Connection Approval from your local Distribution Network Operator.
Again, a competent installer handles this administrative heavy lifting. At Live Solar, we manage the entire G99 application process, keeping you updated at every stage. Our team knows the DNOs across the Midlands and beyond, which speeds up approvals considerably.
This stage takes a few weeks, but it runs parallel to other preparation work, so it rarely delays your installation date.
Step 4: System Design and Final Preparations (Week 4-6)
While approvals are processing, your installer gets to work on the fully engineered design plan.
This isn't a quick sketch: it's a comprehensive blueprint including detailed electrical schematics, precise panel placement specifications showing pitch and orientation, structural calculations confirming your roof can bear the additional weight (typically around 15-20 kg per square meter), and component specifications for panels, mounting systems, inverters, and monitoring equipment.
You'll review this design and approve it before any equipment is ordered. This is your chance to ask questions, request adjustments, or clarify any concerns.
Once approved, your installer books an installation date and orders all the hardware. Quality panels and inverters can take a few weeks to arrive, so don't be surprised if there's a short wait between design approval and installation day.
What makes Live Solar different at this stage: We don't just design a system that works: we optimize for your specific energy consumption patterns. Our veteran-owned team brings the same attention to detail and mission-focused approach we learned in service to every commercial installation. We want your system performing at peak efficiency from day one.
Step 5: Installation, Testing, and Go-Live (Week 7-8+)
Installation day has arrived. Here's what happens:
The physical installation process:
- Scaffolding goes up (if needed for roof access)
- Mounting system installation on your roof
- Solar panels attached and wired together
- Inverter installation (usually inside or near your main electrical panel)
- All components wired and connected
- Connection to your mains electrical distribution board
You'll need a temporary electrical supply interruption during the final connection: usually just a few hours, and your installer will schedule this for minimal business disruption.
Timeline: As a rough guide, installation typically takes about one week for every 150-200 panels. A medium-sized commercial system (50-100 kW) usually takes 1-2 weeks. Weather and site-specific safety requirements can affect this timeline.
Once the physical work is done, an electrical engineer conducts thorough system testing and commissioning. They verify everything operates correctly, check all protection systems comply with regulations, and issue an Electrical Installation Certificate (EIC) confirming compliance with UK wiring regulations.
The final step is submitting G99 commissioning documentation to the DNO: official evidence that your system is complete and connected.
Beyond Installation: Maximizing Your Savings
Getting your commercial solar system installed is just the beginning. To truly hit that 70% energy cost reduction, you need to actively manage your system.
Off-peak charging strategies: If you've paired your solar with battery storage (highly recommended), you can charge your batteries during off-peak hours when electricity is cheapest, then use that stored power during expensive peak times. This strategy alone can add 20-30% to your savings.
Grid services: Battery owners can also participate in grid services like the Demand Flexibility Service, where you actually get paid for reducing demand during peak times. It's essentially getting paid to use your own stored solar power: pretty brilliant, really.
Real-time monitoring: This is where Live Solar's cutting-edge monitoring technology really shines. Our systems give you granular visibility into your generation, consumption, and savings. You can spot inefficiencies immediately, adjust your usage patterns, and maximize every kilowatt your panels produce.
Taking the Next Step
Commercial solar installation in 2026 is more accessible, more affordable, and more profitable than ever before. With the right installer guiding you through these five steps, you'll be generating clean energy and slashing your operating costs within 8-10 weeks from initial consultation to go-live.
At Live Solar, we've refined this process across dozens of commercial installations throughout the Midlands and beyond. As a British veteran-owned business with full MCS accreditation, we bring discipline, expertise, and genuine care to every project. We're not just installing solar panels: we're helping UK businesses build energy independence and reduce their carbon footprint.
Want to explore what commercial solar could do for your business? We'd love to walk through your specific situation and show you the numbers. Sometimes seeing your potential savings spelled out clearly is all it takes to make the decision easy.
Ready to start cutting those energy costs? Get in touch with Live Solar and let's schedule your site assessment.